What is a LAMP stack?
A LAMP stack is a popular software bundle and the acronym “LAMP” stands for Linux, Apache, MySQL, and PHP. These four components are used together to create and run dynamic web applications. Linux is the operating system, Apache is the web server, MySQL is the database management system, and PHP is the programming language used to build the web application. This combination of software is widely used because it is open-source, reliable, and easy to set up and maintain. Together, these components provide a powerful platform for developing and deploying web applications.
Learning how to manually set up a LAMP stack on a Google Cloud VM will allow you to gain a deeper understanding of the underlying components and how they work together. Additionally, once the LAMP stack is set up, it can be used to host a wide range of web applications, from simple static websites to more complex, dynamic web applications using PHP and MySQL.
Alternatively, you could install a LAMP stack automatically using the Cloud Marketplace. However, the purpose of this post is to understand how the LAMP stack is actually setup.
1. Sign up for a Google Cloud Account
Google offer a free trial for new accounts to try out all the cloud platform products. One of the best features is that you don’t have to be concerned about being charged when the trial runs out. Unless you choose to manually upgrade, they stop the services rather than charging you automatically. The google free trial currently includes $300 in credit to use over the first 90 days.

Google Cloud Platform free trial benefits
2. Create a VM instance on GCP
- From the GCP dashboard, click on Compute Engine, then VM Instances
- It should ask you to enable the Compute Engine API, go ahead and do so
- After enabling, it should return you to the VM Instances page, Click on Create Instance
- Fill out the new VM instance details: (example settings in the image below)
- Name: lamp-test
- Region: US-West or US-East recommended (slightly cheaper than others)
- Machine Type: e2-micro
- Boot Disk – click Change and set the following:
- operating system: debian
- version: debian GNU/linux 10 (buster)
- boot disk type: balanced persistent
- size: 10gb
- Firewall:
- enable http
- enable https traffic
- Click Create
- Congratulations, your VM is being created (give it a few minutes)
- Congratulations!, the L – Linux part of LAMP is now done
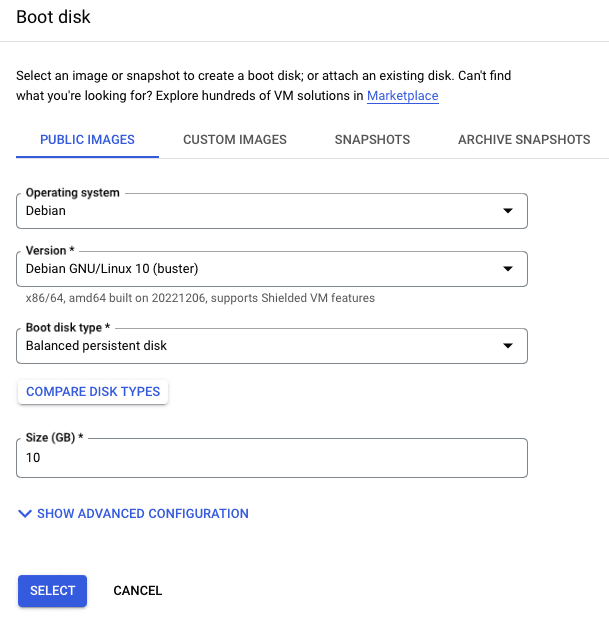
VM Boot disk settings on GCP
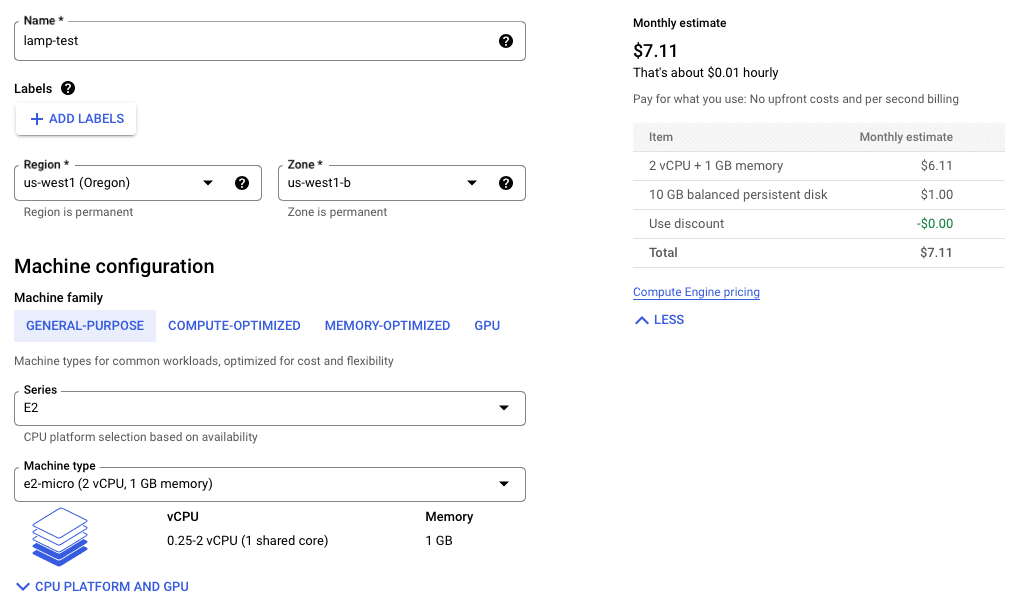
Example VM instance settings on GCP
3. Setup LAMP stack on VM instance
- From the VM instances page, you should now see the VM you created in the list.
- Write down or copy your external IP (you will need it soon). This can be found in the external IP column of your VM’s row in the list.
- The green/red light indicates status of your VM, that is whether it is running or not.
- You can start or stop your VM by clicking the three vertical dot menu on the right side. Note: You are only charged when it is running.
- Next, we are going to connect directly to your VM. In the list, click the SSH button next to your VM.
- Execute the following commands in the open VM window
sudo apt-get update
sudo apt-get install apache2 php libapache2-mod-php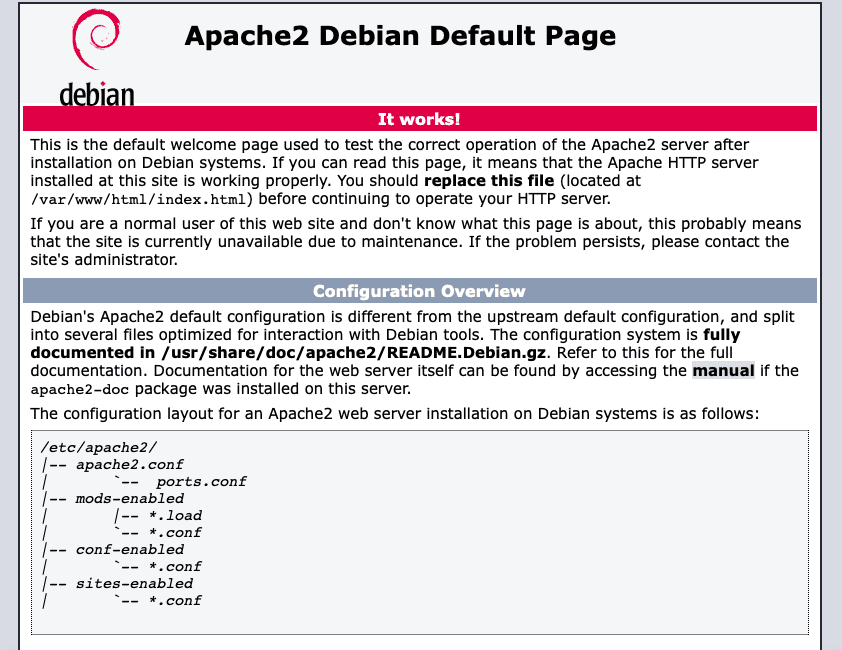
Apache test page
- Next, we need to check everything is working:
- In a browser, goto http://<external_ip> and you should see the Apache test page. It should be something like http://22.168.186.109 (this is just for reference purposes, not an actual address that will work)
- Now we are going to create a simple php file in the default web server root at
/var/www/html/to make sure php is working. Execute the following code to create your test file:
Create a simple PHP file
sudo sh -c 'echo "<?php phpinfo(); ?>" > /var/www/html/phpinfo.php'- To access the file you just created and confirm Apache and PHP and working together properly, in your browser go to: http://<external_ip>/phpinfo.php
- If you can see the PHP test file, Congratulations – now the L, A and P in LAMP are done
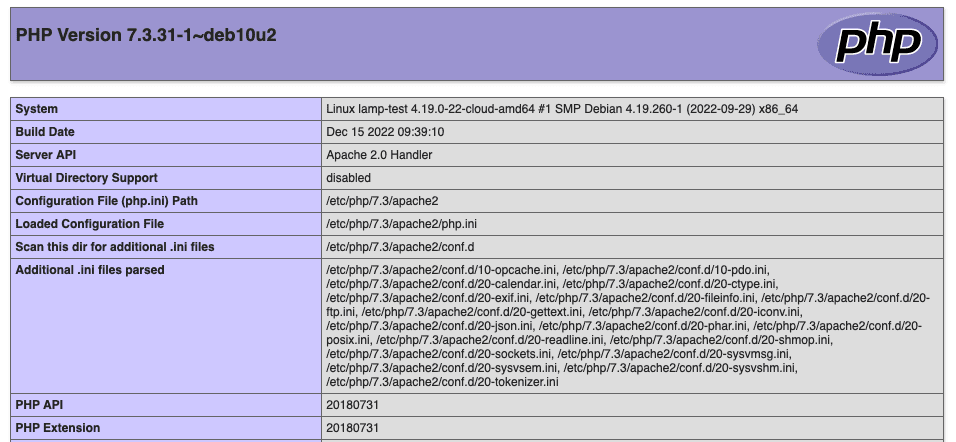
Example PHP test file
4. Install MySql (MariaDB)
Now we need to install MySql to complete our LAMP setup. Use the following commands to install, check the status, start and connect to the database service.
Install MariaDB
sudo apt-get update
sudo apt-get install mariadb-server php php-mysql
Status check - Is the db service running?
sudo systemctl status mariadbStart the database service
sudo systemctl start mariadbConnect to the database service
sudo mysql- After initial install, it’s a good idea to run the database service configuration. This will guide you through steps such as:
- Setting the root user password if it is not yet set
- Removing the anonymous user
- Restricting root user access to the local machine
- Removing the test database
Configure MariaDB
sudo mysql_secure_installation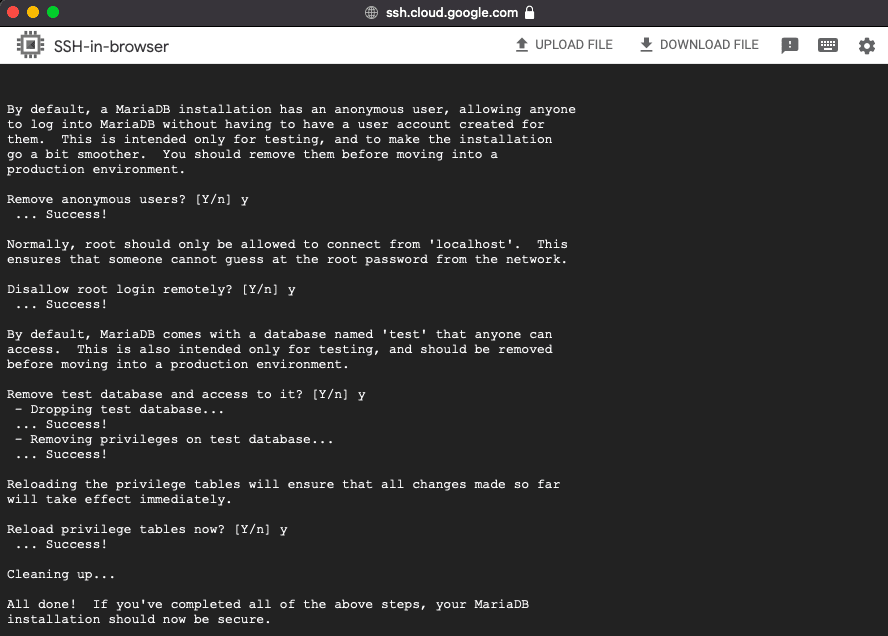
Initial database service configuration
Congratulations! You have now completed setting up a LAMP stack on Google Cloud
- Links here to next section – add php myadmin to manage the db



0 Comments